A whirlybird is a wind driven turbine vent that exhausts hot air and stale air from the roof cavity so the house runs cooler and drier. When wind blows across the vanes, the turbine spins, creating low pressure that pulls warm, moist air out of the roof space. Thermal buoyancy helps even in light wind, so passive whirlybirds move air without electricity. Used with soffit vents for intake and good insulation over the ceiling, a whirlybird roof vent improves air circulation, reduces moisture buildup and can trim energy bills by taking heat load off air conditioning.

What a whirlybird does in a roof ventilation system
- Exhausts hot air from the roof cavity so the ceiling runs cooler in summer.
- Controls moisture by venting steam and humid air that migrate through the ceiling plane.
- Improves ventilation in complex roof structures where dead pockets trap heat.
- Pairs well with soffit vents, ridge vents or powered vents where wind is low.
Whirlybird roof vents do not replace cooling, but they reduce the roof temperature that drives heat into rooms. On metal roofs and dark roofs, the difference at the ceiling can be marked on hot, still afternoons.

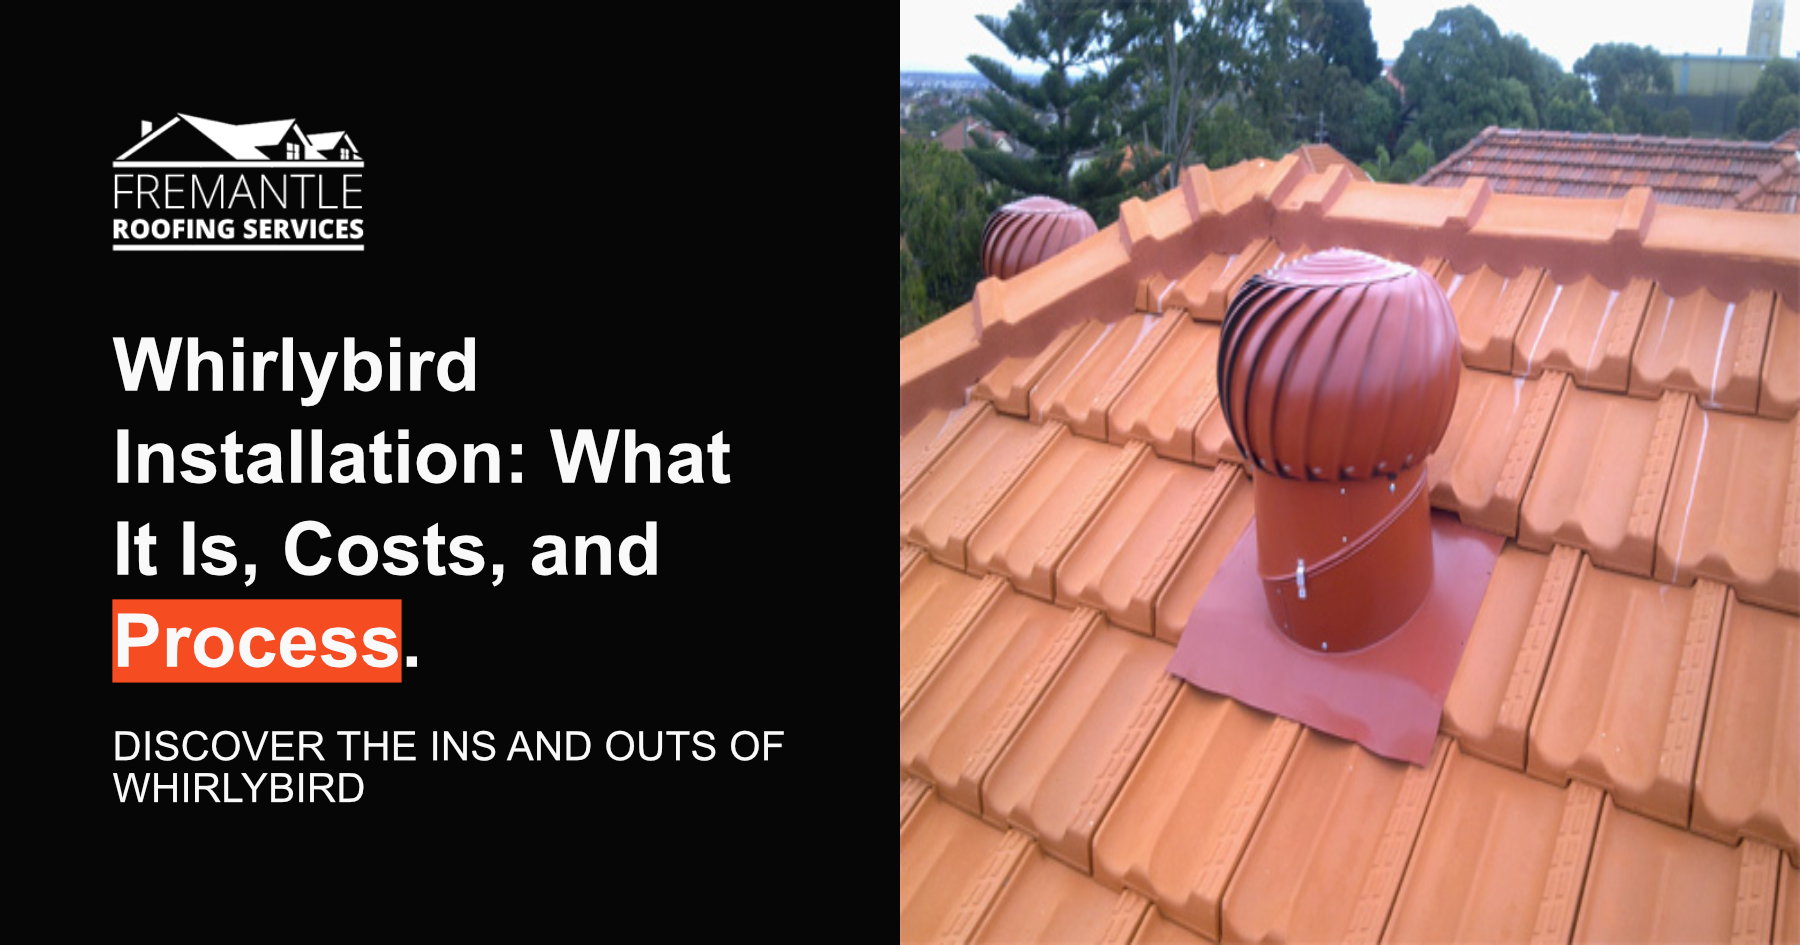
Roof types and bases that suit whirlybird installation
Whirlybirds work on metal roofs, tiled roofs and shingle roofs with the right base.
- Corrugated and deck profiles: use purpose bases or adjustable curbs that match the sheet form and angle.
- Tiled roofs: use a tray flashing or dektite and lap to sarking so the penetration stays water tight.
- Shingle roofs: lap the pitched base in shingle fashion with step flashing at side junctions.
Always check the stated pitch range for the base, and ensure the spindle is vertical after install for smooth rotation.
How many whirlybirds your house needs
Sizing starts with roof space volume and available intake.
- Use the supplier’s airflow rating per unit to plan units per 100 m² of roof space.
- Add a unit for long hip and valley layouts that block crossflow.
- Balance with equal or greater intake area via soffit vents or discrete eave vents so the turbine can pull freely.
Wind driven vs powered vents
- Passive whirlybirds (wind driven): simple, reliable, no wiring, spin whenever there is breeze or heat lift.
- Active whirlybirds (solar or electric powered vents): steady extraction in still conditions, useful for large attics or hot microclimates.
Pick noise rated products if bedrooms sit below and match flow to your roof volume.
Where to place whirlybirds for efficient ventilation
- Set near the ridge on the highest plane to capture the stack effect.
- Stagger units along long ridges for even draw across the attic.
- Keep clear of gable eddies, skylights, antenna cables and upper downpipe outlets that could splash.
- Maintain set backs from solar arrays so panels do not shade the turbine or block maintenance access.
How to install a whirlybird: step by step
The whirlybird installation process varies by roofing material, but the sequence is similar. Work only in dry, light wind and use safety equipment.
Tools and materials
Vent kit with pitched base or curb, compatible flashing, screws with bonded washers, rivets, butyl or silicone sealant as specified, snips, drill with hex driver, riveter, measuring square, template, tape, pencil, putty knife, PPE. Keep a tarp on hand for a temporary dry in if weather turns.
Before you cut
- Measure and assess the roof structure from inside the attic. Locate rafters and purlins so you do not cut framing.
- Determine position high on the slope, central to the bay you want to ventilate. Confirm there is clear airflow to soffit vents.
- Mark the hole with the supplied template. Double check centreline, clearances and pitch range for the base.
Metal roof installation
- Cut the opening with snips. De burr edges so flashing sits flat.
- Slide the base under the upslope sheet where possible to shed water correctly.
- Seal as specified, not more. Apply butyl where the instructions call for it.
- Fix the base using compatible screws. A common pattern uses three screws across each rib section, then additional perimeter screws per the data sheet.
- Attach the turbine so the spindle stands vertical. Spin test by hand.
- Water test after cure. Start low with a hose and move upslope to confirm a watertight seal.
Tiled roof installation
- Remove tiles around the opening and cut sarking neatly.
- Set a tray flashing that laps under the upslope sarking and over the downslope tiles.
- Install the base and seal per instructions. Reinstate tiles with neat cuts and proper side laps.
- Fix the turbine, check plumb and spin freely, then water test.
Shingle roof outline
- Lift the shingle courses, cut the hole, and slide the pitched base.
- Step flash side joints in shingle fashion and nail in the prescribed pattern.
- Seal nail heads where required by the manufacturer and water test.
Quality checks
- Spindle vertical, no wobble
- All screws tight with washers compressed, not crushed
- Laps face away from prevailing wind
- No exposed cut edges left unprotected on steel

Common installation mistakes to avoid
- Cutting through rafters or leaving gaps that create leaks
- Setting the base too low on the roof where wind splash can enter
- Relying on sealant rather than correct laps and fixings
- Starving the turbine of intake because soffit vents are blocked with insulation
- Forgetting to isolate power near antenna cables and solar equipment
Roof pitch and weatherproofing
Most turbines suit moderate pitches. For low pitches or flat sections, fit a raised curb so stormwater cannot enter, and flash to the membrane upstand height. On steep slopes, confirm extra fasteners and clip counts for high wind sites. In cyclone or coastal regions, use corrosion resistant materials and follow the local wind classification.
Will a whirlybird cool the house or just ventilate the roof
A whirlybird ventilates the roof cavity. The house feels cooler because the ceiling surface temperature drops and heat flow is reduced, especially on metal roofs. Results improve when you seal ceiling gaps, top up insulation, shade north and west glazing, and ensure continuous airflow from soffit vents up to the turbine vent.
Noise, leaks and maintenance
A good unit is quiet and weather tight. Noise usually means worn bearings, a bent vane, or a base out of plumb. Leaks trace to poor laps or degraded washers.
Maintenance list
- Seasonally spin test by hand and listen for rough bearings
- Re tighten fasteners and replace cracked washers
- Clear debris around intakes and check ridge capping nearby
- Re coat any scratched metal to prevent rust spots

Whirlybirds vs ridge vents vs powered fans
- Whirlybirds: point extraction that actively pulls when spinning, easy retrofit, no electricity.
- Ridge vents: continuous slot at the peak, neat look on simple gable or hip roofs, rely on wind and stack.
- Powered vents: set airflow in still zones, solar options avoid wiring and thermostats can control run time.
Mixed systems can work if intake matches total exhaust and vents are placed so air flows from eaves to the high exit without short circuiting.
Safety essentials for any roof work
- Use edge protection or fall arrest, secure ladders and avoid wet or windy conditions.
- Wear non slip shoes, gloves and eye protection.
- Walk on load points only and use crawl boards on tiles.
- Do not work alone. Keep tools tethered and cords clear.
- In the roof space, watch for nails, low trusses, insulation and live cables.
When to call a professional
Hire a professional roofer when the roof is high, steep, fragile or complex, or if you need to coordinate multiple vents, correct blocked soffits and seal the ceiling plane. A pro will measure airflow, pick the right base, install to the data sheet and photograph laps and fixings for warranty.

Frequently Asked Questions
Conclusion
To install a whirlybird that performs, pick the right base for your roof, place it high near the ridge, balance it with generous soffit vents and follow the installation process to the letter.
Cut cleanly, set the spindle vertical, secure with compatible screws, and prove a water tight result with a gentle hose test once sealants cure. Done right, a turbine ventilator will quietly ventilate the roof space, limit moisture and heat, and support a more efficient ventilation system across Australia’s climates.

Adam has 28 years of roof tiling and restoration experience, he has been running Fremantle Roofing Services since its inception and is still trying to improve the business and its reputation. Adam has worked on everything, Often a little grumpy before 10 am but otherwise always happy to discuss the job and explain exactly what’s going right or wrong with your roof.


Leave A Comment