Ridge cap installation is part of roofing maintenance and construction. It seals the top of the roof, keeping it dry and debris free. This will walk you through why ridge caps are important, the types, tools and materials you’ll need and the steps to install.

Ridge Cap Installation
The metal roofing ridge cap, also known as the roof ridge cap, installed at the peak of the roof where the slopes meet, is a critical component. Its main jobs are:
- Protecting the peak from moisture and debris
- Protecting the roof and finish
- Keeping water out on rainy days with wind driven rain
- Preventing damage to your roofing system
But that’s not all. Ridge caps are not just functional they also play a big part in the overall look of your roof. They keep it clean and finished looking and make your home look beautiful. Plus they strengthen the roof structure and the entire roofing system.
Ever wondered what keeps your roof safe from severe weather? It’s the ridge cap working hard to keep water out and strengthen the roof structure. Correct ridge cap installation is important, affects not just the roof’s function but also its life and look.

Types of Ridge Caps for Metal Roofs
Metal roof ridge caps come in many styles to suit different roofing profiles. Here are some of the most popular:
- Roll Top Ridge: a standard style that many homeowners choose for its classic look and it’s a metal roof ridge cap
- COLORBOND® ridge capping: for durability and look
- ZINCALUME® ridge capping: for durability and look
Our website uses cookies and data to offer you options to suit your preferences and needs including personalized content and ads.
If you want a finished look, copper ridge capping might be the way to go. These ridge caps can fit with Corrugated Iron, Trimdek and Klip Lok roofs so no matter what your roof design is, there’s a ridge cap to fit. From standing seam to shingle style and vented options, there’s plenty to choose from.
Tools and Materials
Before you start, assemble the tools and materials. Here are the tools you’ll need:
- Carpenter’s pencil: to mark measurements on the metal
- Chalk line: without red chalk so it won’t leave hard to remove marks, to mark straight lines
- Cutting snips: your best friend when trimming the metal ridge cap to size.
To secure the ridge cap you’ll need:
- Metal-to-metal screws with sealing washers
- Silicone sealant, such as Ultra 1000 and a caulking gun for sealing
- Butyl tape sealant for a tight seal under the ridge cap
- Cut-resistant roofing gloves to protect your hands from sharp edges.
Preparing the Roof for Ridge Cap Installation
Ridge cap installation relies on proper preparation. Read the manufacturer’s installation guide thoroughly to ensure compliance with local building codes. Clean the roof surface thoroughly, remove any sawdust, dirt or debris from the previous metal roofing installation.
Mark the centre of the ridge cap to the roof’s slope using a speed square and protractor. This way the ridge cap is centred and aligned before you install the ridge cap and install the ridge cap roofs so you can install the ridge cap correctly.
Also make sure there’s a 2-inch gap between the metal roofing sheets at the peak of the roof to keep the metal roofing panels at the lower eaves straight and flush.

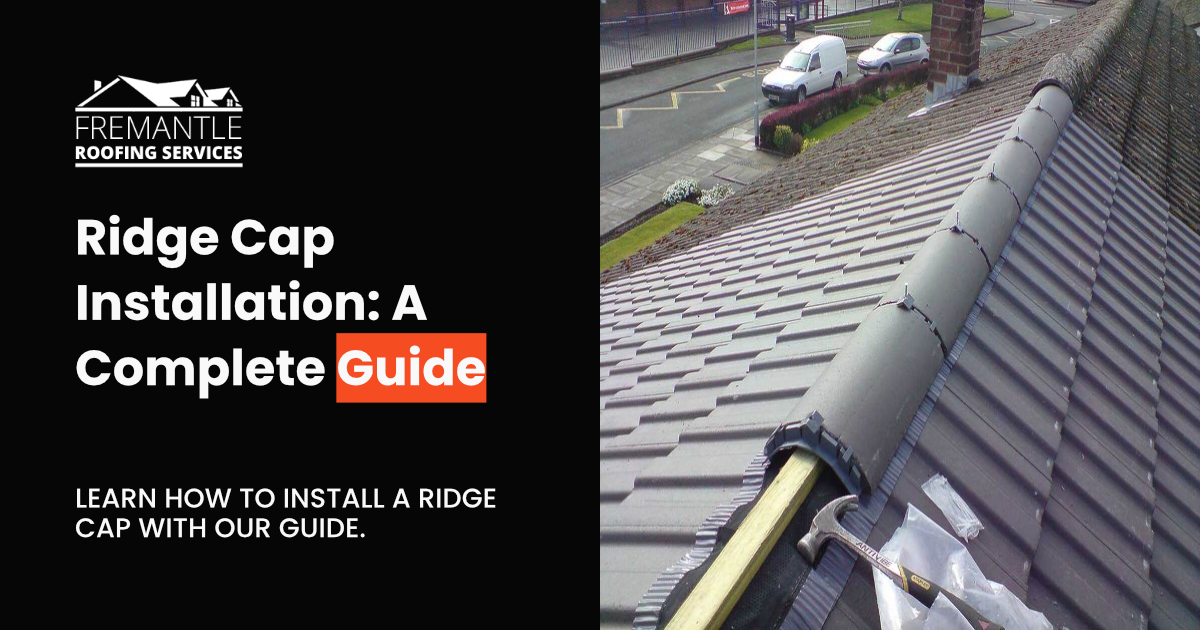
How to Install a Ridge Cap
Now let’s get into the nitty gritty. First create a guide with a chalk line. Centre a piece of ridge cap on the peak of the building and mark the cap’s edges on both sides of the ridge. Apply butyl tape sealant ½ inch to the inside of the chalk line on both sides of the ridge cap.
To secure the ridge cap use at least two-inch roofing nails. The guide covers vented and non-vented ridge caps on exposed fastener panels such as R Panel/PBR Panel and Western Rib/7.2 Panel. It goes into detail on both. Follow these steps to install the ridge cap correctly.
Cutting and Finishing Ridge Cap Ends
Cutting and finishing the ridge cap ends is critical for a tight fit.
- Make a 1-inch mark on the outside of the ridge cap.
- Measure 1 inch from the edge of the ridge cap and cut away 1 inch of the hem on both sides.
- Use a screwdriver to pry open both hems within the 1-inch mark.
Then fold the uncut side of the ridge cap to 90 degrees using a hand seamer. This way the ridge cap will fit tight and secure on the roof and have a clean finish and weather tight.
Foam Closures for Non-Vented Ridge Caps
For non-vented ridge caps foam closure strips are required to prevent debris and insects from getting under the ridge cap. There are two types of closures used for this purpose: solid closures and vented closures. Solid closures are made of dense foam material and are designed to fit over the ribs of the roof panels.
Run closure strips along the lower edges of the ridge cap. This way no gaps will be left for debris or insects to get in and compromise your roofing system.
Ridge Cap Vents for Vented Ridge Caps
Vented ridge caps are required to allow hot air to escape from the attic and prevent water and insects from getting in. A vented ridge cap like ProfileVent® is required for this purpose. To install Profile Vent place it ½ inch to 1 inch up-slope from the edge of the ridge cap.
This way the vent will function correctly and allow for air circulation and prevent moisture build up. Follow these steps to install the ridge cap vent and keep your roofing system ventilated and weather tight.

Overlapping Ridge Caps
Overlapping ridge caps is critical to get full coverage and prevent water intrusion. Here’s how:
- Lap the piece of ridge cap 6 inches over the end of the first piece during installation and create an overlap ridge cap.
- The overlap should be at least 6 inches to be water tight.
- Screw the overlapping ridge caps every 12 inches on both sides of the overlap.
To get a water tight seal apply sealant 2 inches from the overlapping edge before screwing. This is critical to prevent water intrusion and your roofing system. Proper overlapping also creates a smooth ridge line and looks good.
Common Mistakes to Watch Out For
Avoid common mistakes during ridge cap installation and save time and money and costly roof repairs. Incorrect measurements can result to wrong size panels and delay the project and additional cost. Make sure all measurements are correct before cutting or ordering materials.
Loose or missing fasteners are the number one cause of metal roof leaks. Make sure the nails and screws of the ridge cap are tight and secure, replace any that are loose or missing. Using the wrong sealant or incorrect application can also cause roof leaks. Always use the recommended sealant and apply it correctly to avoid sealing issues.
Last but not the least, remember installing the trim is the hardest part of installing a metal roof so take your time to do it right.
Choosing the Right Ridge Cap Colour
Choosing the right ridge cap colour can make a big impact on your home’s exterior. Choose a colour that matches your home’s siding, doors, windows and landscaping to get a cohesive look. Also consider the local roof colour trends to blend with the neighbourhood.
Check the colour samples at different times of the day to ensure the chosen colour looks good in bright light and during sunset. Whether you choose a contrasting colour to make your home stand out or a matching colour for a traditional look, the right colour choice matters.
Ridge Cap Maintenance
Regular maintenance is key to extend the life of your ridge cap. Here’s how:
- Inspect ridge caps twice a year or after major storms for damage, wear or leaks.
- Check seams and joints for separation, cracks or missing caulk.
- Seal any gaps.
To keep ridge caps and surrounding areas clean:
- Remove debris with a soft brush or blower.
- Look for rust or corrosion and remove it with sanding, wire brushing or chemical cleaners.
- Trim nearby trees to prevent branches from damaging the ridge cap or blocking the roofing system.
Conclusion
In summary, ridge cap installation is a vital part of metal roofing to protect from moisture and debris, durability and looks. From knowing the different types of ridge caps and getting the right tools to following a step by step guide and avoiding common mistakes, every step matters.
Proper maintenance is key to extend the life of your ridge cap and roofing system. Follow the tips above and your roof will be in great shape for years to come. Remember a well installed and maintained ridge cap is not just a finishing touch but a part of your roofing system.
FAQs
What is the purpose of a ridge cap in roofing?
The purpose of a ridge cap in roofing is to cover the peak where two roof slopes meet to protect from moisture and debris and to enhance the durability and looks of the roofing system.
What are the types of ridge caps for metal roofs?
There are different types of ridge caps for metal roofs, Roll Top Ridge, COLORBOND, ZINCALUME, copper, standing seam and shingle-style. Choose the one that fits your roof design and requirements.
What tools and materials do I need for ridge cap installation?
Carpenter’s pencil, chalk line, cutting snips, metal-to-metal screws, silicone sealant, caulking gun, butyl tape sealant and cut-resistant gloves. These are the tools and materials you need for a successful installation.
How do I overlap ridge caps during installation?
Overlap ridge caps by 6 inches, screw every 12 inches on both sides and seal with sealant to prevent water intrusion.
What to avoid during ridge cap installation?
Measure accurately, use the right fasteners, choose the right sealant and trim correctly. These will prevent roof leaks and other issues.

Adam has 28 years of roof tiling and restoration experience, he has been running Fremantle Roofing Services since its inception and is still trying to improve the business and its reputation. Adam has worked on everything, Often a little grumpy before 10 am but otherwise always happy to discuss the job and explain exactly what’s going right or wrong with your roof.

